|
|
|||||||||||||||||||||||||||||||
|
Lightning!
The Porcupine An ElectroStatic Discharge Device, Static Discharger, Static Brush or Static Wick |
|||||||||||||||||||||||||||||||
|
In the early 1980's I got tired of the tower being hit by lightning so often. My long time friend, Dale Heatherington - WA4DSY, and I decided to apply a little physics and try to discharge the static as it built up to reduce the liklihood of lightning strike. This is the basic principle of Ben Franklin's lightning rod. The idea we had was to use as many discharge probes as possible. We used stainless hose clamps to clamp wires on a mast to form a discharge brush. Later, I came up with the scheme shown below for building the porcupine. |
|||||||||||||||||||||||||||||||
| Disclaimer: Prior to installing the porcupine, my tower was being hit by lightning several times a year. After installing this device, my tower has been hit by lightning only about 3 times in over 15 years. There are times when you just can't bleed off the static charge fast enough to prevent a strike but I have noticed a marked improvement here. Dale has experienced several significant lightning strikes causing damage at his location. There is significant disagreement in the scientific community about the true worth of such a device as this. I'm not making any claim for its usefulness in your situation. Furthermore, I don't claim any scientific evidence as to the effectiveness of these devices. As usual, build your own at your own risk and draw your own conclusions. I would be interested in hearing from you regarding your results. | |||||||||||||||||||||||||||||||
| Electrostatic Receiver Noise - Cause and prevention of static discharge problems to receiver operation. | |||||||||||||||||||||||||||||||
| Fulgurites - When lightning strikes the ground it heats the soil and fuses it into a glass like formation. | |||||||||||||||||||||||||||||||
| Van - KF4LEX contributed this great photo of a fulgurite he dug out himself | |||||||||||||||||||||||||||||||
| Another interesting fulgurite photo | |||||||||||||||||||||||||||||||
| Tower Guard - You can buy a static discharger from the Tower Jack folks. | |||||||||||||||||||||||||||||||
|
|||||||||||||||||||||||||||||||
|
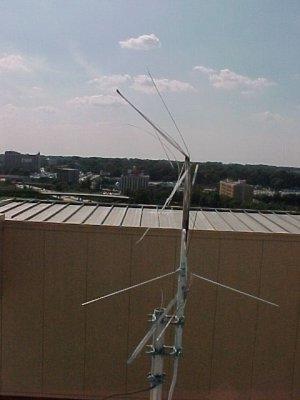
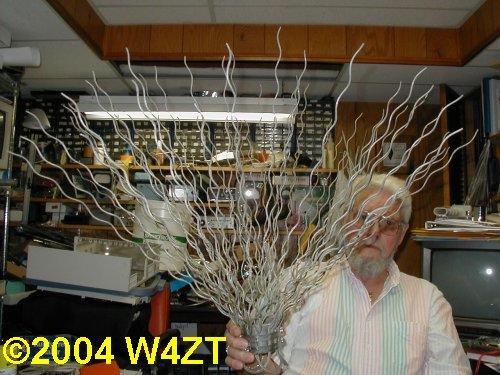
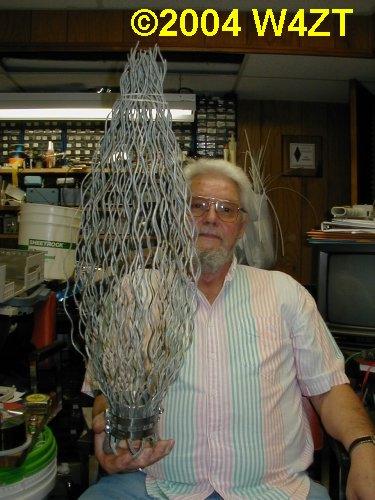
My
Porcupine
|
|||||||||||||||||||||||||||||||
 |
|||||||||||||||||||||||||||||||
|
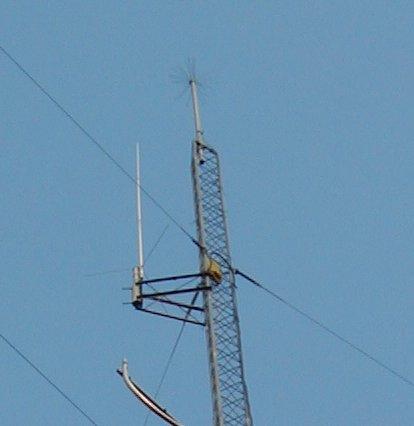
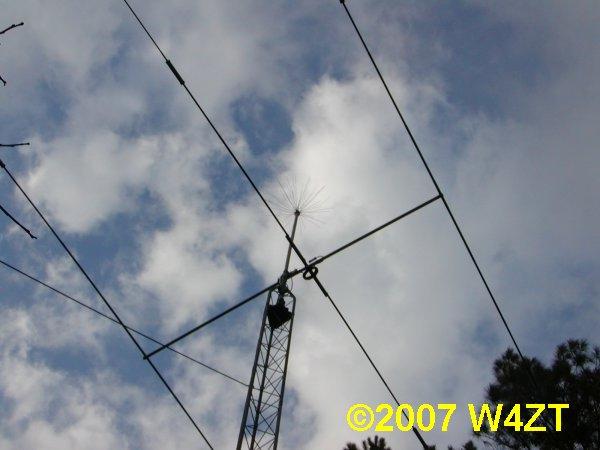
This
is the home made porcupine on top of the mast. The repeater antenna
is on the left. I also have a porcupine on top of the small tower the
HF beam is located.
|
|||||||||||||||||||||||||||||||
|
|||||||||||||||||||||||||||||||
|
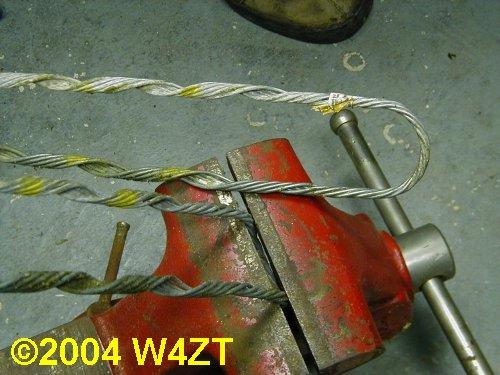
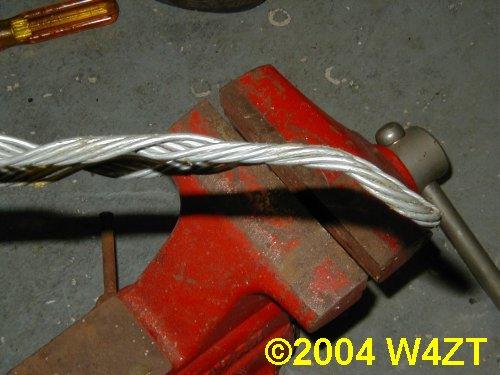
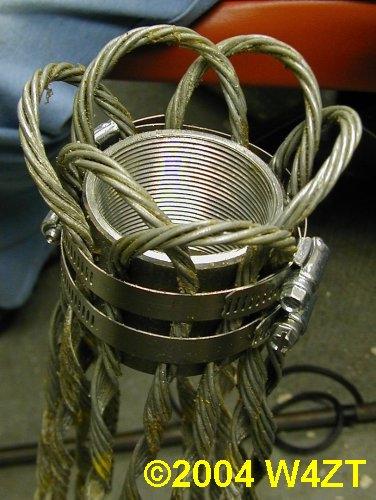
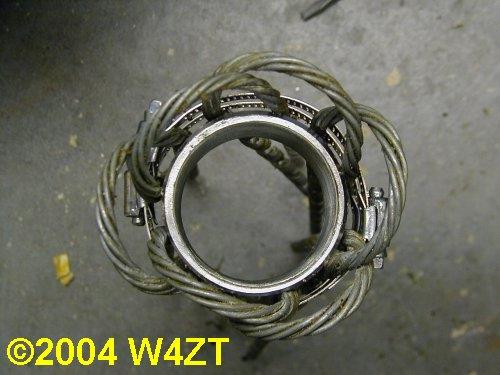
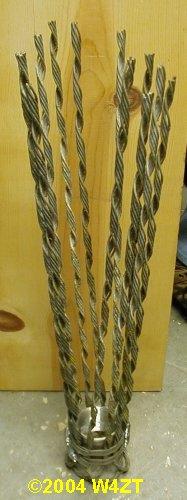
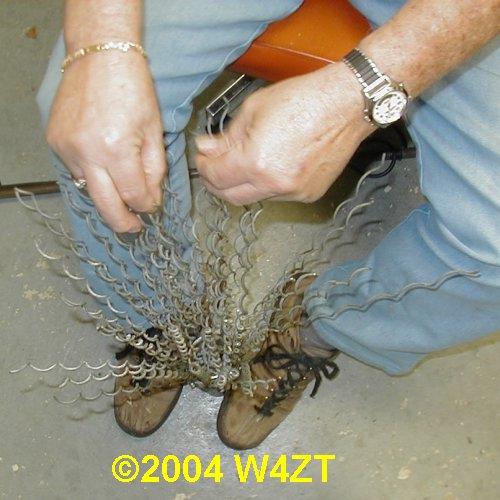
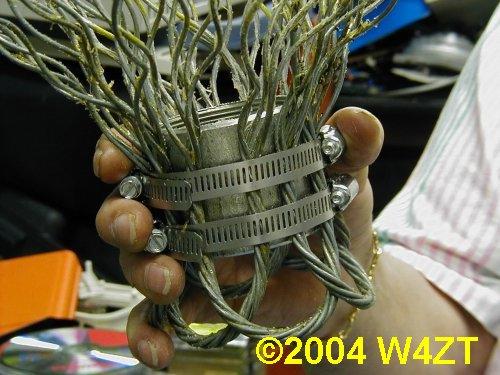
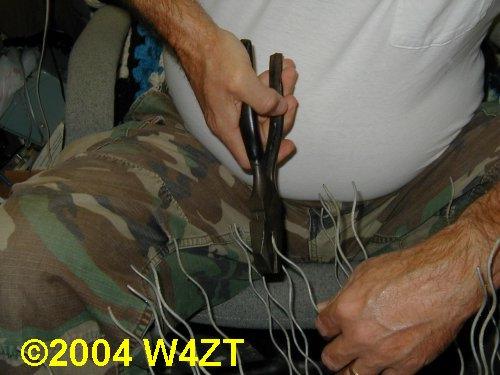
Start with a ten foot length of rigid aluminum electrical conduit (okay Henry, use steel if you must) which is threaded on each end and provided with one coupling when purchased (or the mast you have in the top of your tower). Also obtain six yellow tab guy grips (sometimes called dead ends) and three stainless hose clamps large enough to go around the coupling and the grips. This will work just as well on the end of a mast without a coupling, just assemble and clamp directly to the mast. |
|||||||||||||||||||||||||||||||
| (click the small pictures to see a larger picture in a new browser window) | |||||||||||||||||||||||||||||||
|
|||||||||||||||||||||||||||||||
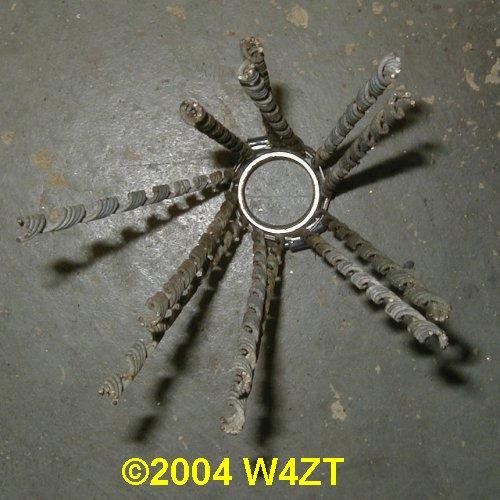
| When installing the porcupine, fan out the wires to form a broad brush to bleed off the static charge. Use the third hose clamp to clamp around the lower end of the mast. Solder a piece of heavy copper braid to the hose clamp tail end and to a piece of insulated heavy (at least number 8) copper wire which runs all the way to the base of the tower, clamps with a ground clamp to the base and then continues off the base to a long copper plated ground rod. Do the best you can to provide a low impedance ground for your tower. Never ground THROUGH the concrete base structure. Always run a heavy copper ground wire to the top of your tower. Never depend on the tower for your conductor. Some people disagree with running a ground wire up the tower. Use your own judgement here. Personally, the insulated #8 wire running to the porcupine from ground makes me feel better. The insulation on the wire helps prevent galvanic action between the copper wire and the galvanized tower. | |||||||||||||||||||||||||||||||
|
Lightning Links:
|
|||||||||||||||||||||||||||||||

Last update was on March 16, 2008 11:32